®
®
I know the photo quality is not great; cheap digital camera. But I think these show pretty well what I did. I figured pictures would be better than just written instructions. The setup is a bit messy right now since they aren't active and walking around much anyway. But they do enjoy exploring so I try not to keep the floor bare and boring. They love climbing over bricks, wood piles, etc. And even digging.
Let me know if you have any questions.
This is where Danny keeps his gravid females, babies, or sick animals. He uses this enclosure whenever he needs to separate an animal from the main pen above.
These first two pictures are basically the groundwork for the outdoor setup that Kylie just started working on it. The black area is going to be a shallow pond laid with chicken wire so the animals can easily climb in or out. The chicken wire is also buried deep in the ground so they can't burrow underneath. The wire is attached to wooden posts and wrapped around the side of the house. I cover will be added shortly as well.
These next pictures show the progess so far. You can see a bridge has been added over the pond, several substrates of sandy dirt and grass, and lots of hiding places. A cover will be installed next.
These stacking units are called Vision Cages. They are highly customizable, look great, and are perfect for housing multiple animals. See more at http://beardiedragon.com
Here are some of his outdoor setups. These are currently being used for turtles, but are an excellent example of what a blue tongued skink setup might look like.
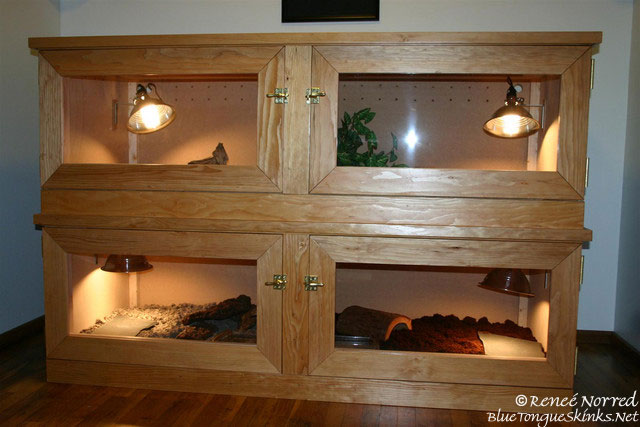
These units were custom built in Oregon. They look amazing even empty, but when you add four adult blue tongues it makes all the difference! Each door opens individually, and this is actually two units stacked. This type of setup is neat because it looks just like a piece of furniture, thusly eliminating giant glass tanks that might otherwise litter your house. The blueprints can be found below.
Bearded Dragons are currently being housed, but as far as I know, a blue tongued skink just moved in. This enclosure is made of wood which holds heat well.
Lisa has a very simple, but yet very effective setup. She uses simple carpet on one end with lots of plants and decorations, and a basking spot on the other end with shredded newspaper for burrowing. She also has an attractive natural backdrop that wraps all the way around the perimeter.


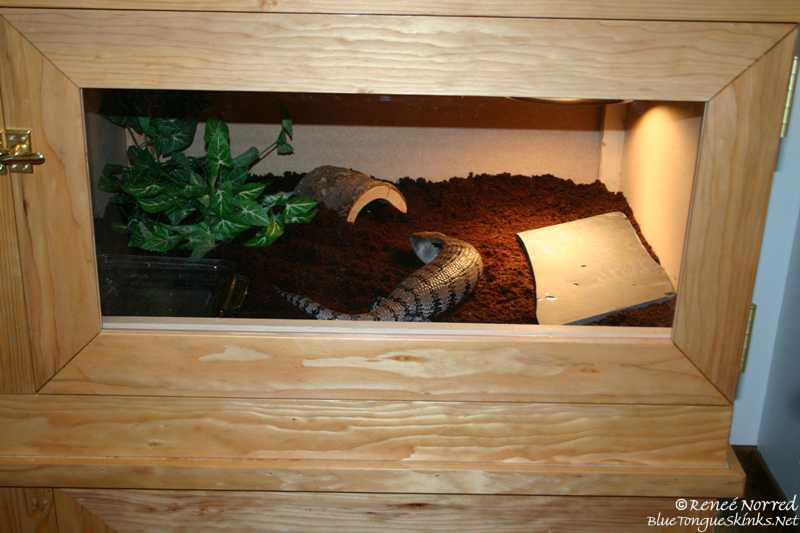
The next set of pictures is just a view of the inside of the larger subsection of the enclosure. Against the back wall is an upside down large dog litter box (that's what the label said) with some straw under it where they sleep sometimes when it's cold overnight.
The second one shows one of the underground shelters. Notice the black cardboard tube for above ground shelter.
The third one shows the corner. The wooden post is 1 1/2" square and I buried it to a depth of about 12". Then I just used plastic ties to attach the lattice to the post.


The last set shows a shallow depression with bricks forming two walls, a small opening, and another tile as the roof.
The second one is also basically a shallow hole with dry grass in it and two pieces of wood over it.
The last one is a closer shot of the one earlier. It's just a whole with bark and grass and a patio tile over it.